Step-by-step Design a House on a Real Site Photo
Feb 24, 2026

From Floor Plan to Final Render with Rendair AI
In this step-by-step guide, we will start with a simple site photo and transform it into a fully designed and visualized house.
We will:
Define the buildable area
Generate a floor plan
Build the house in 3D
Create multiple render angles
Add people and atmosphere
Turn everything into a video
All inside Rendair AI.
Here’s how.
Step 1: Capture Your Site
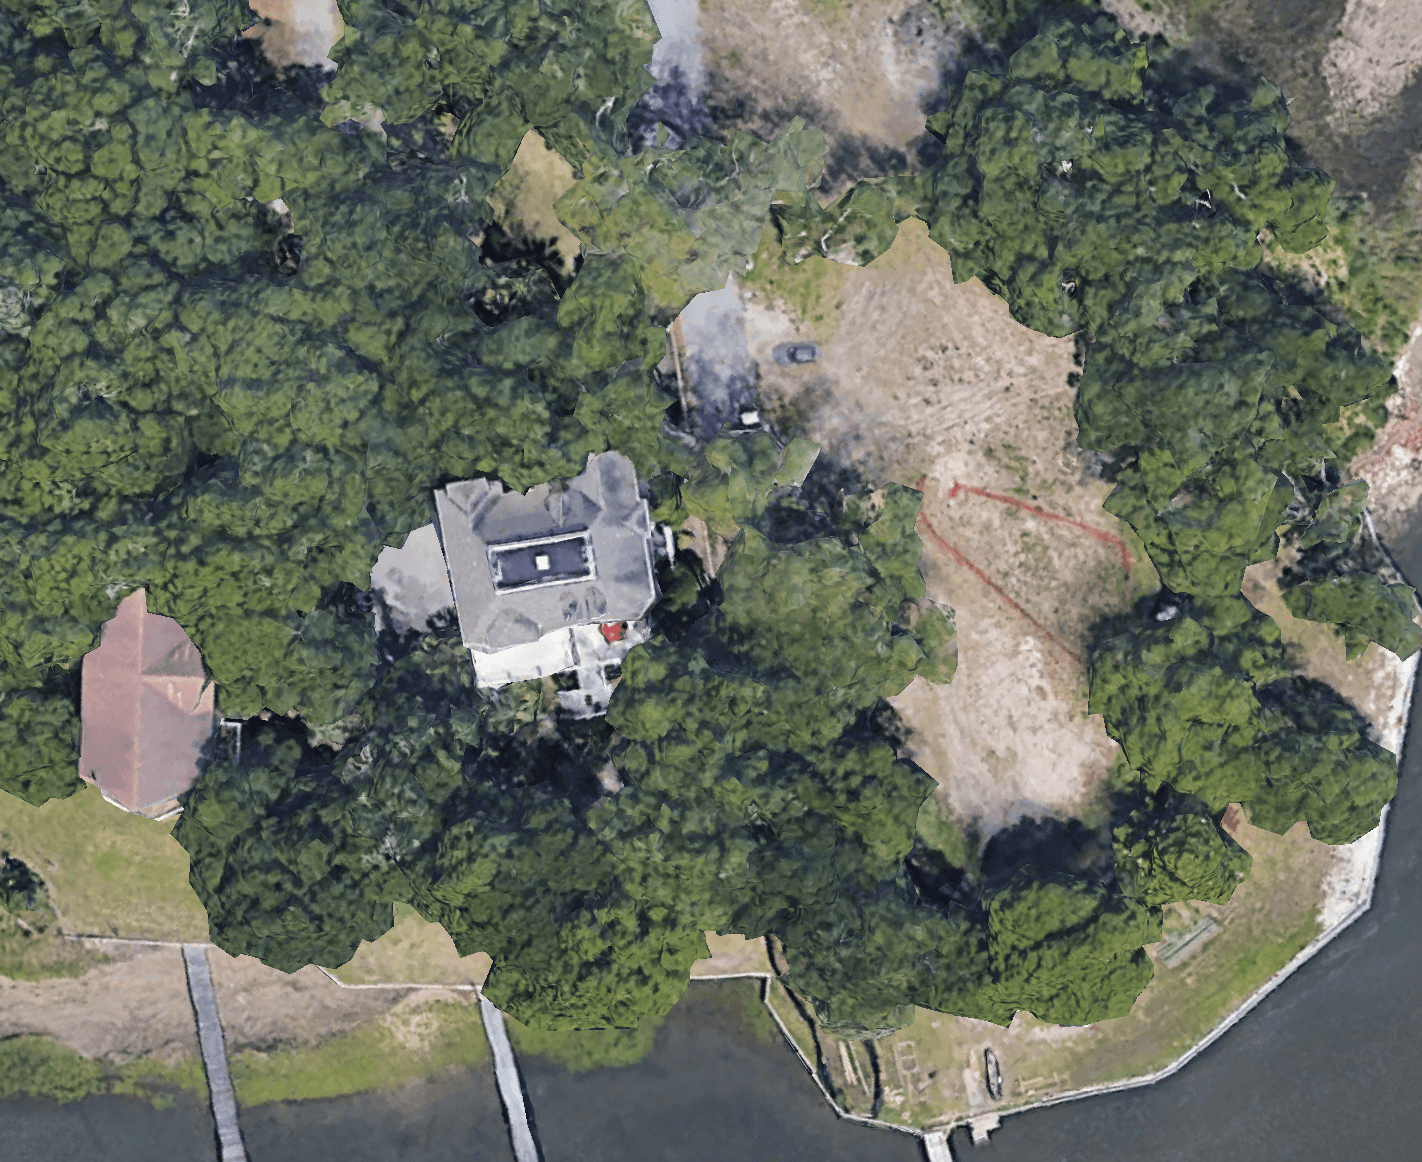
Take a screenshot of your site or make a photo of it.
This can be:
A Google Maps satellite screenshot
A drone image
A phone photo
A site survey image
The clearer the image, the better the results.
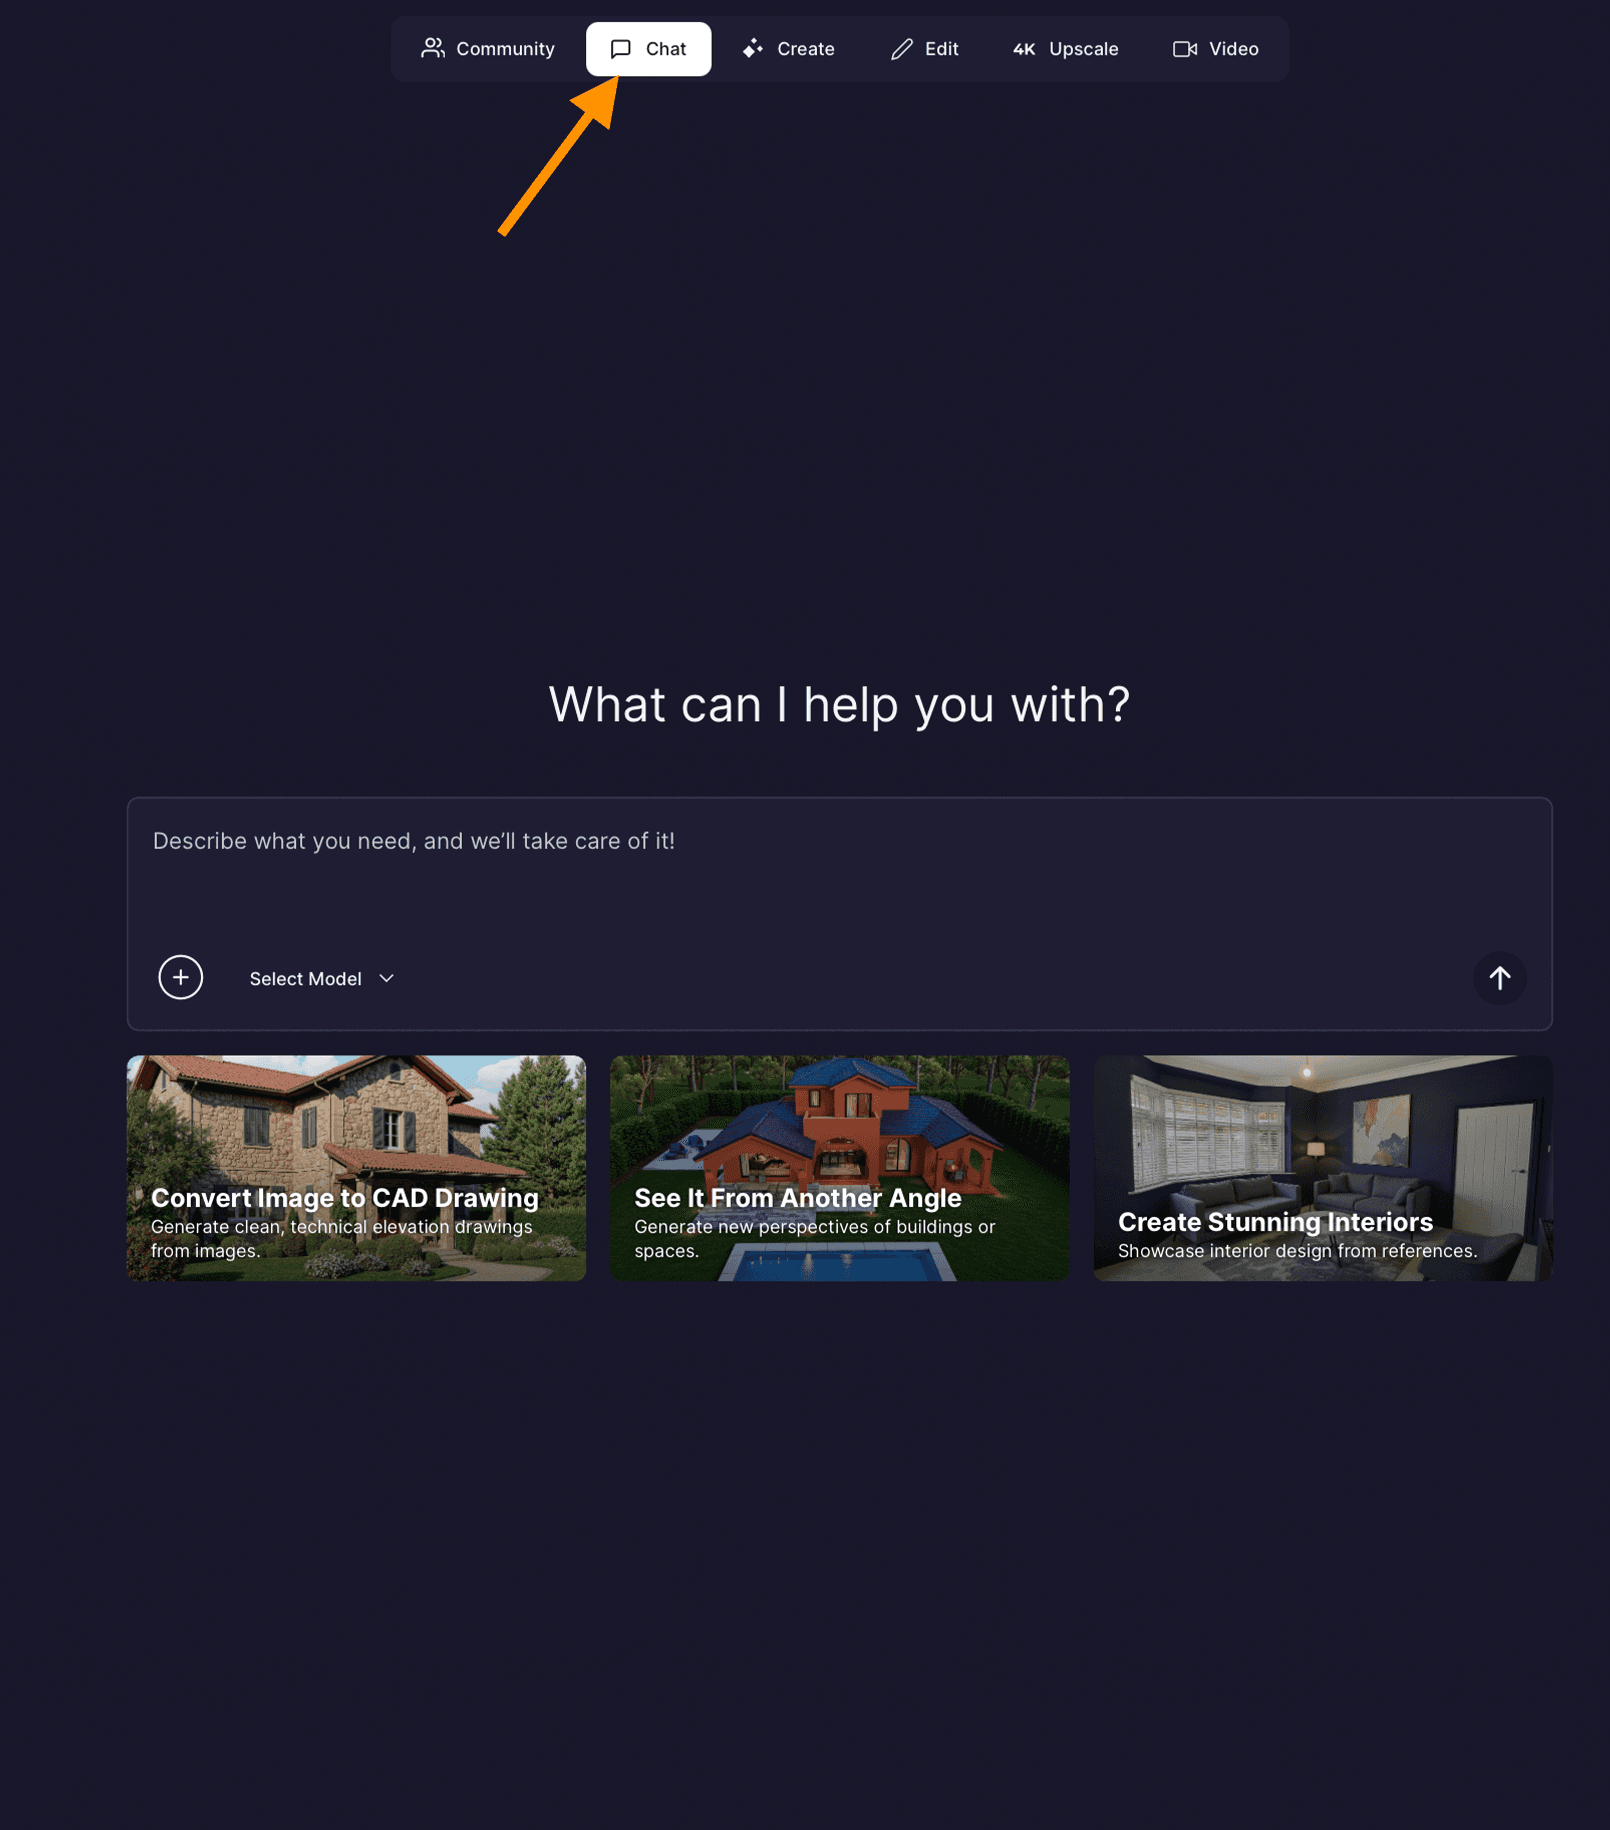
Step 2: Open Rendair AI and Go to Chat
Go to 👉 Rendair AI
Log in and open the CHAT interface. This is where the magic happens.
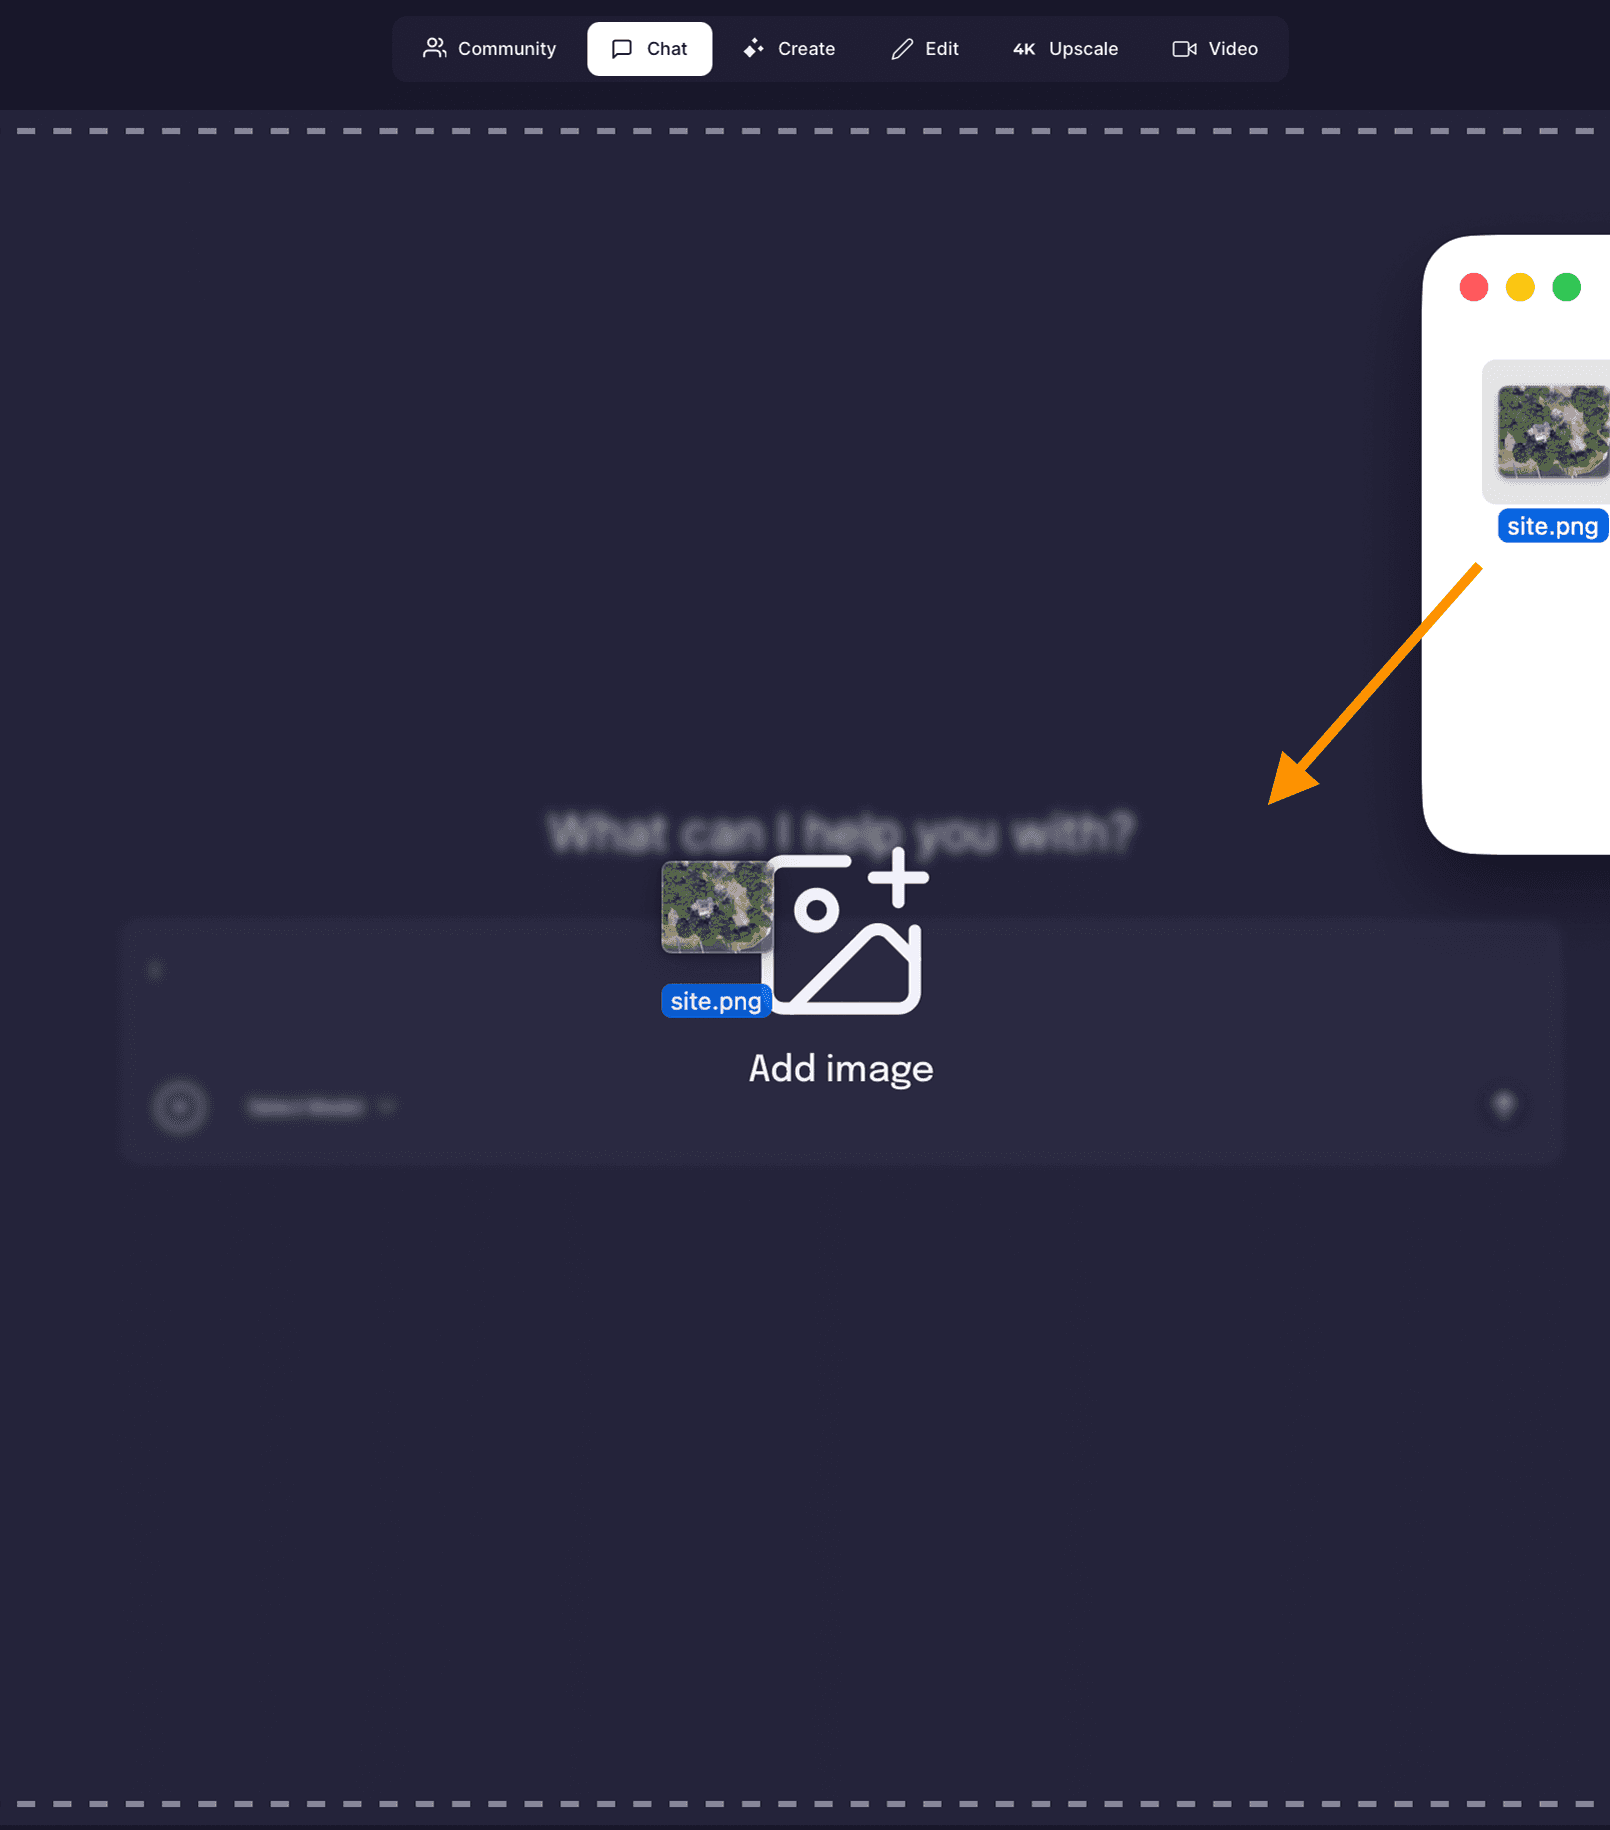
Step 3: Upload the Site
Upload your site photo
Now we are ready to start designing.
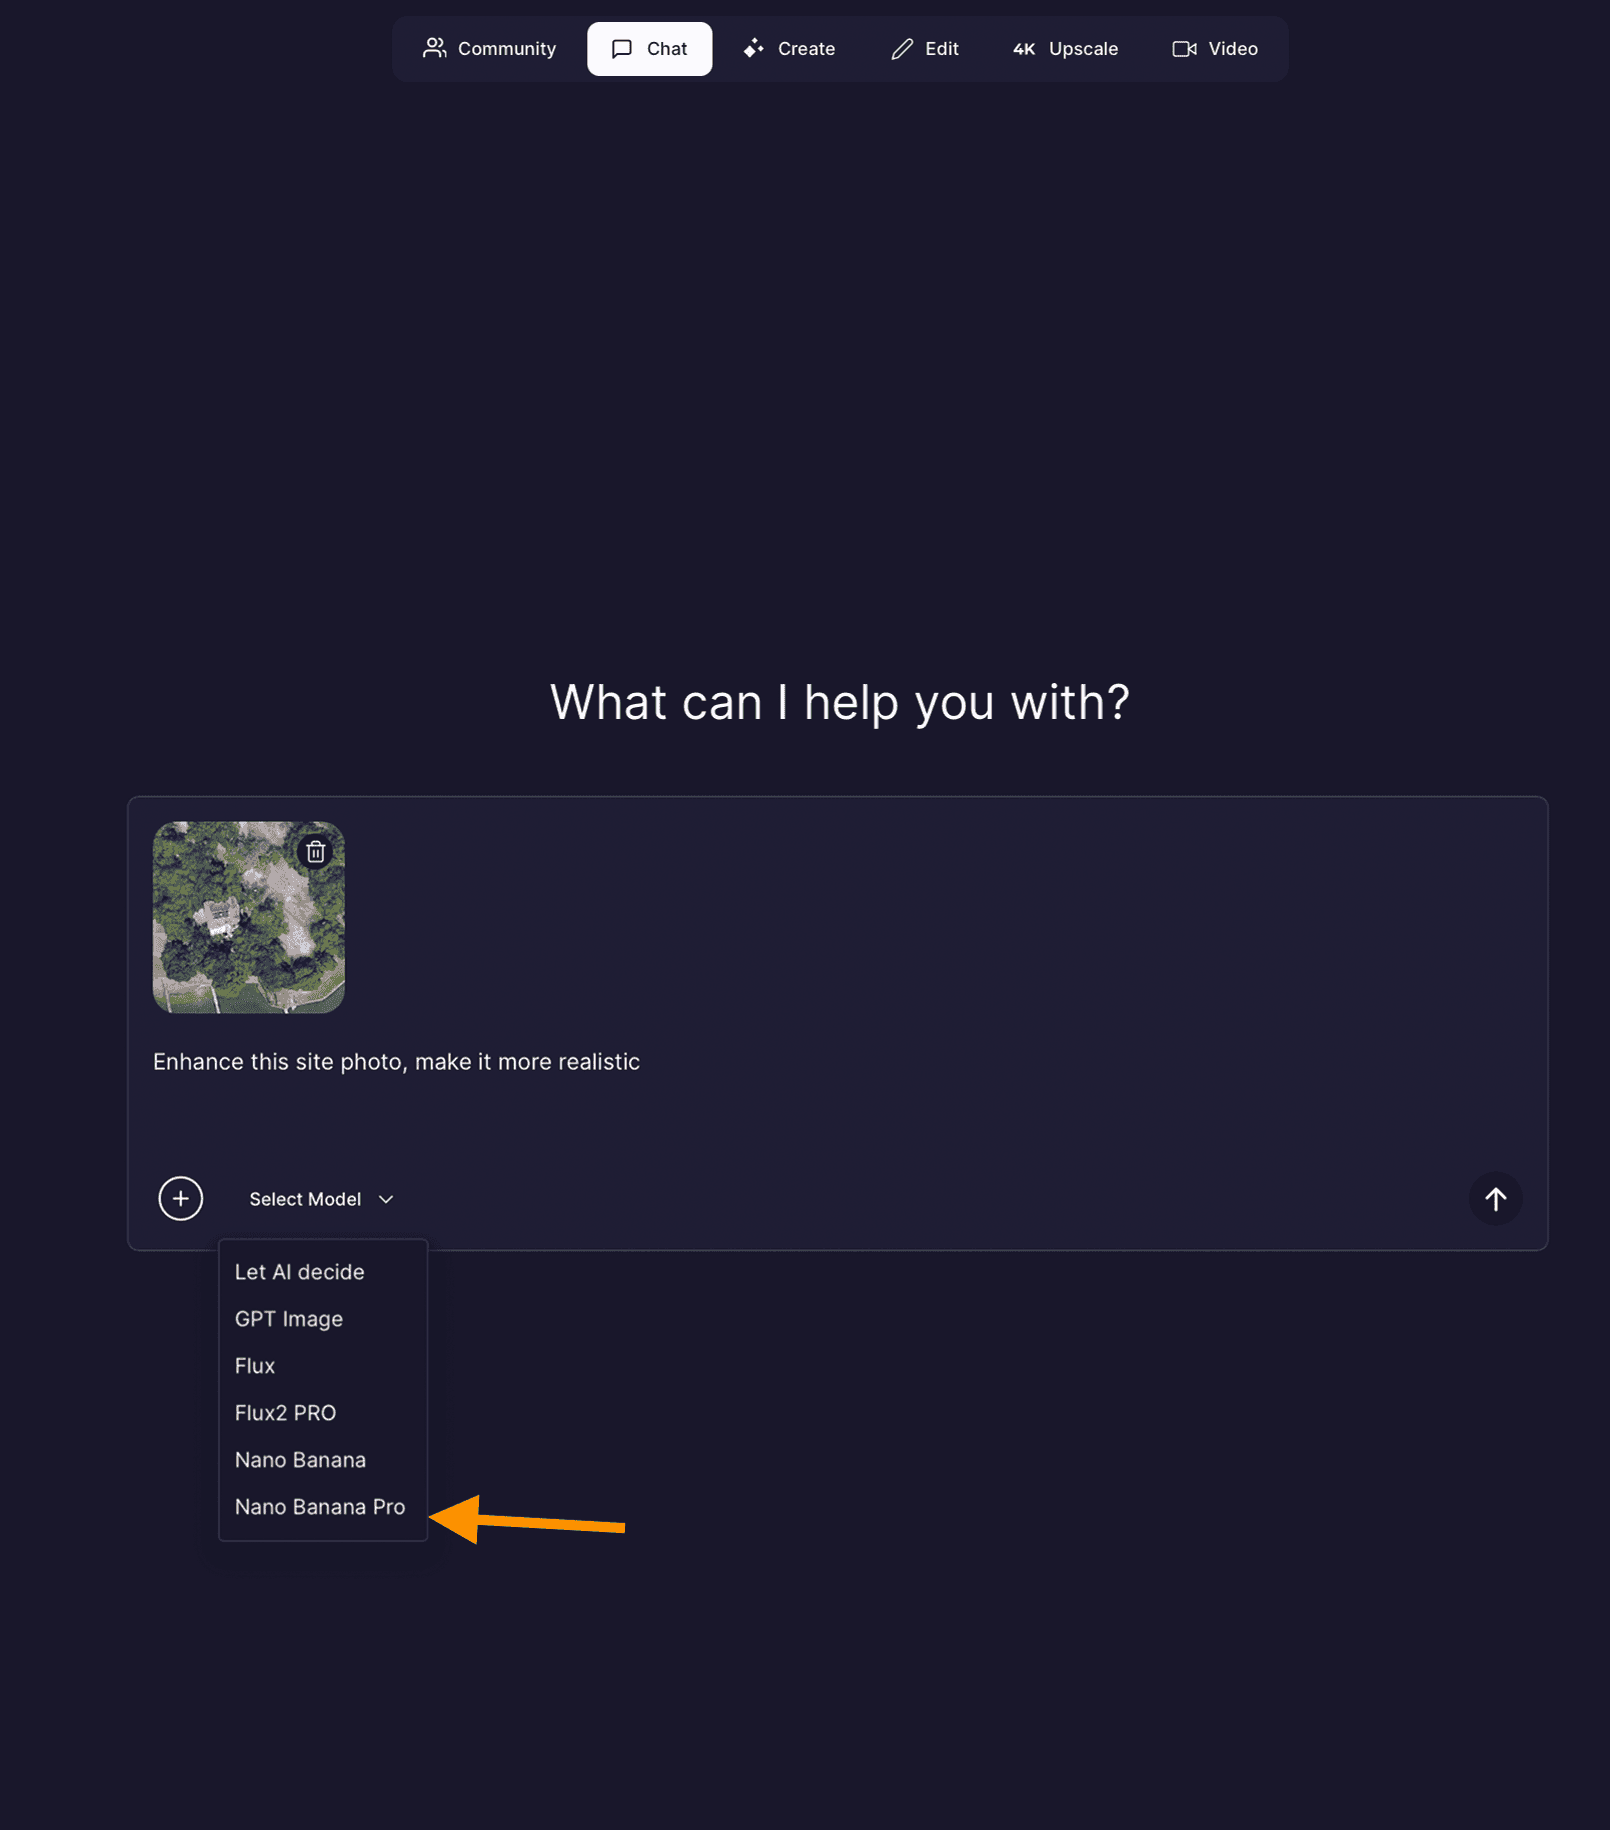
Step 4: Enhance the Site Photo (Optional)
If your image is low quality, improve it first.
Upload your image and prompt:
‘‘Enhance this site photo, make it more realistic’’
If your site photo is already high quality, you can skip this step.
Choose Nano Banana Pro model then generate.
Step 5: First Result
A few seconds later, you will have a cleaner, more realistic version of your site.

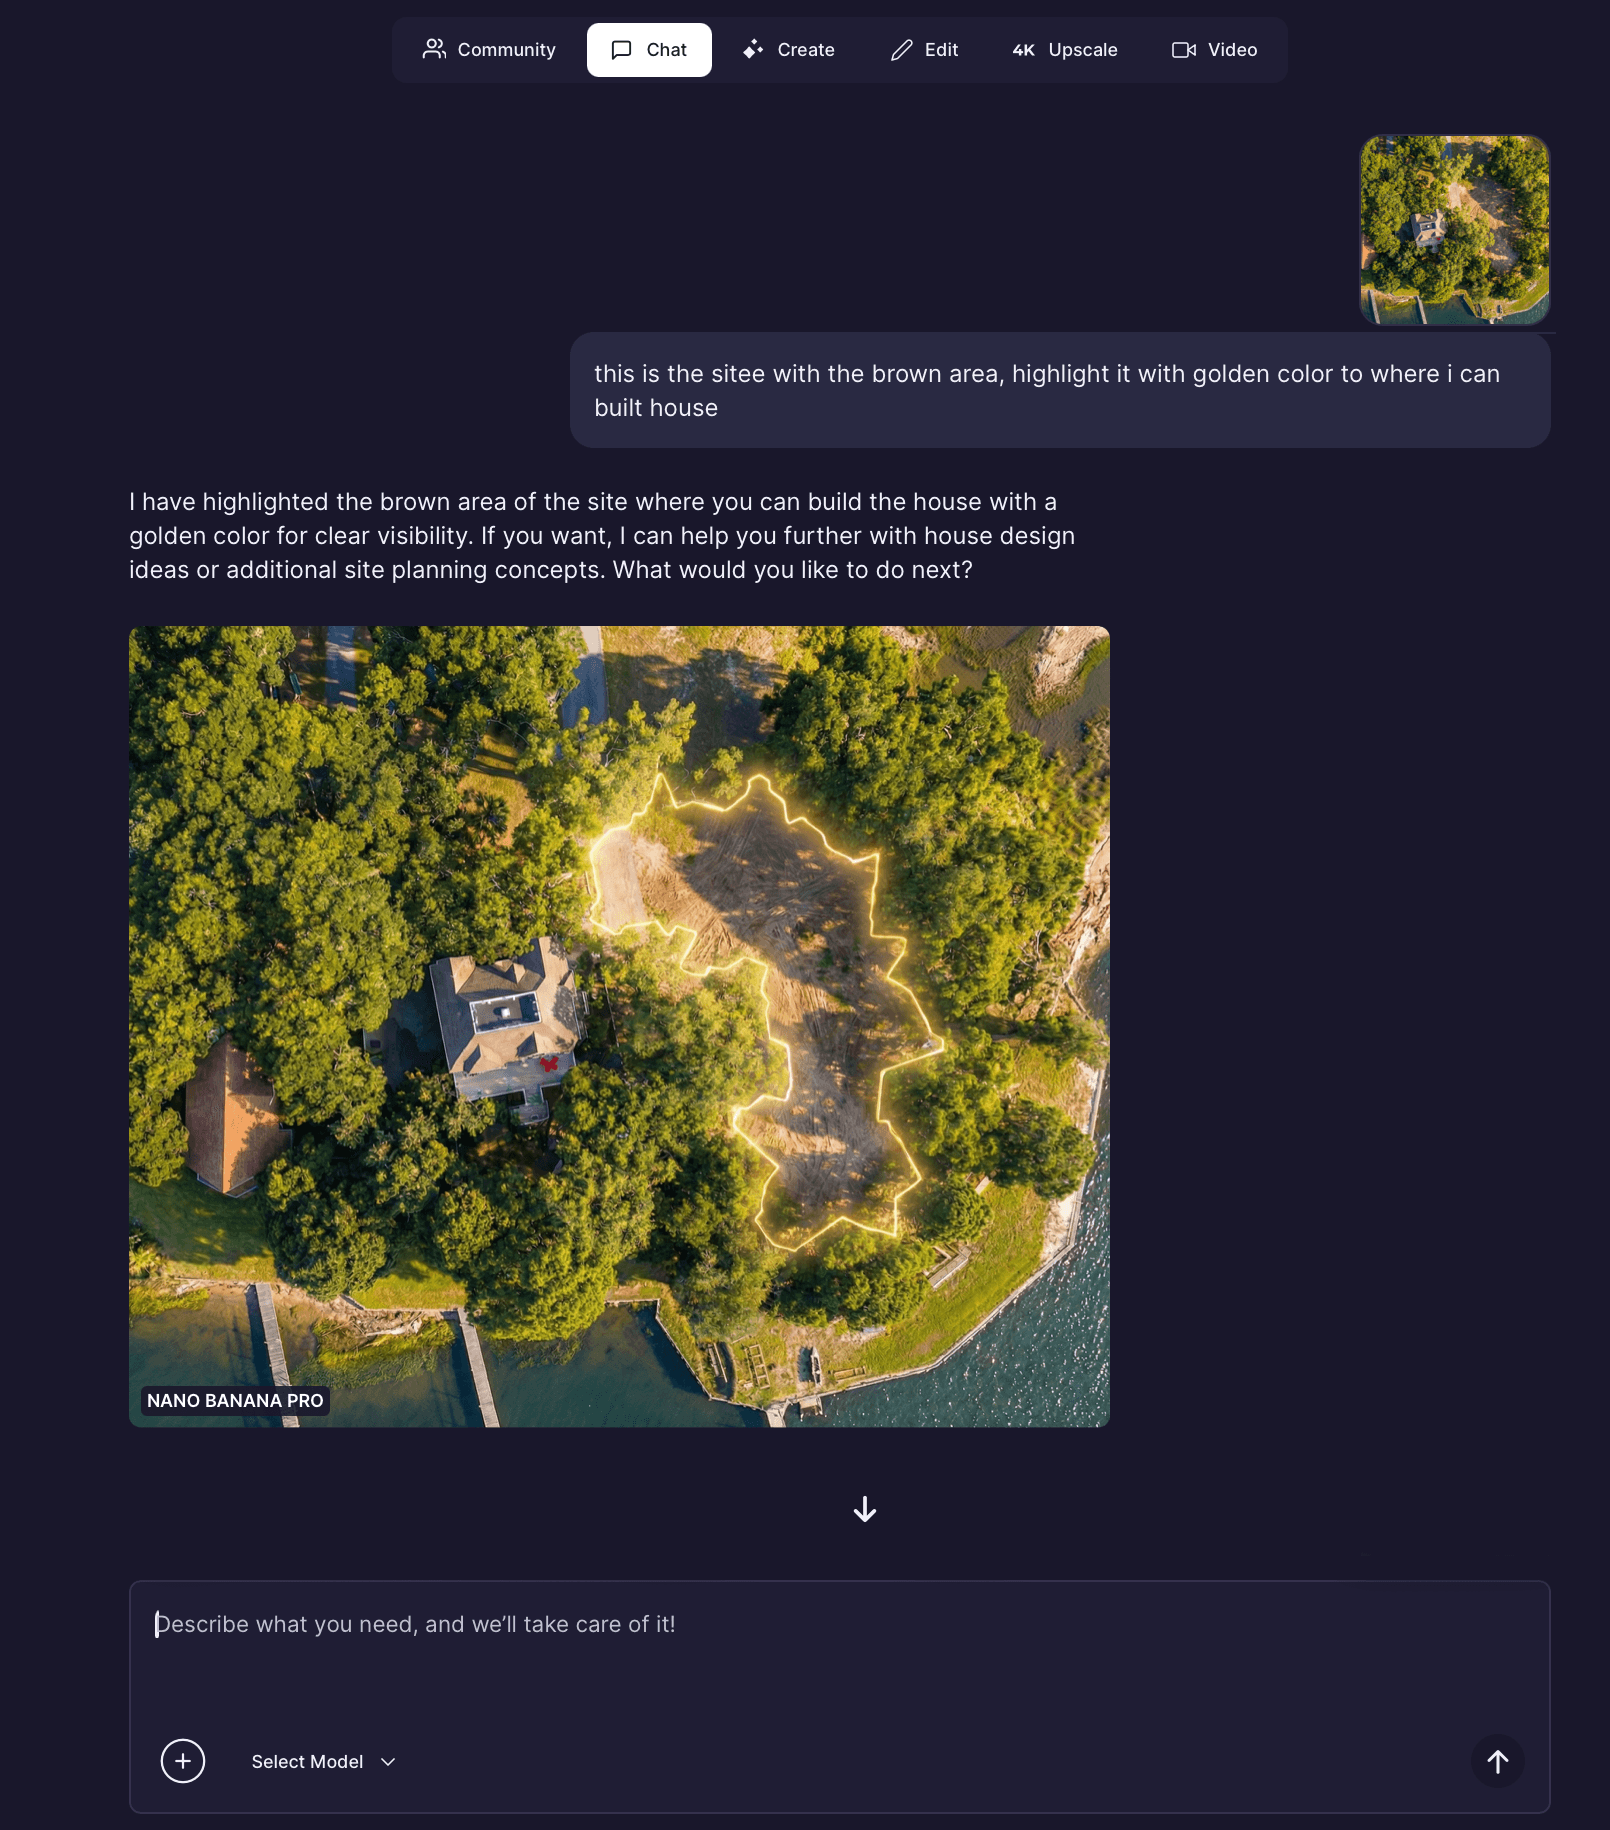
Step 6: Highlight the Buildable Area
Now upload the enhanced image and prompt:
‘‘This is the site with the brown area, highlight it with golden color to where i can built house’’
Generate.
Within seconds, you will receive a version of your site with the buildable zone clearly highlighted in golden color.
This gives you a clear boundary to work inside.
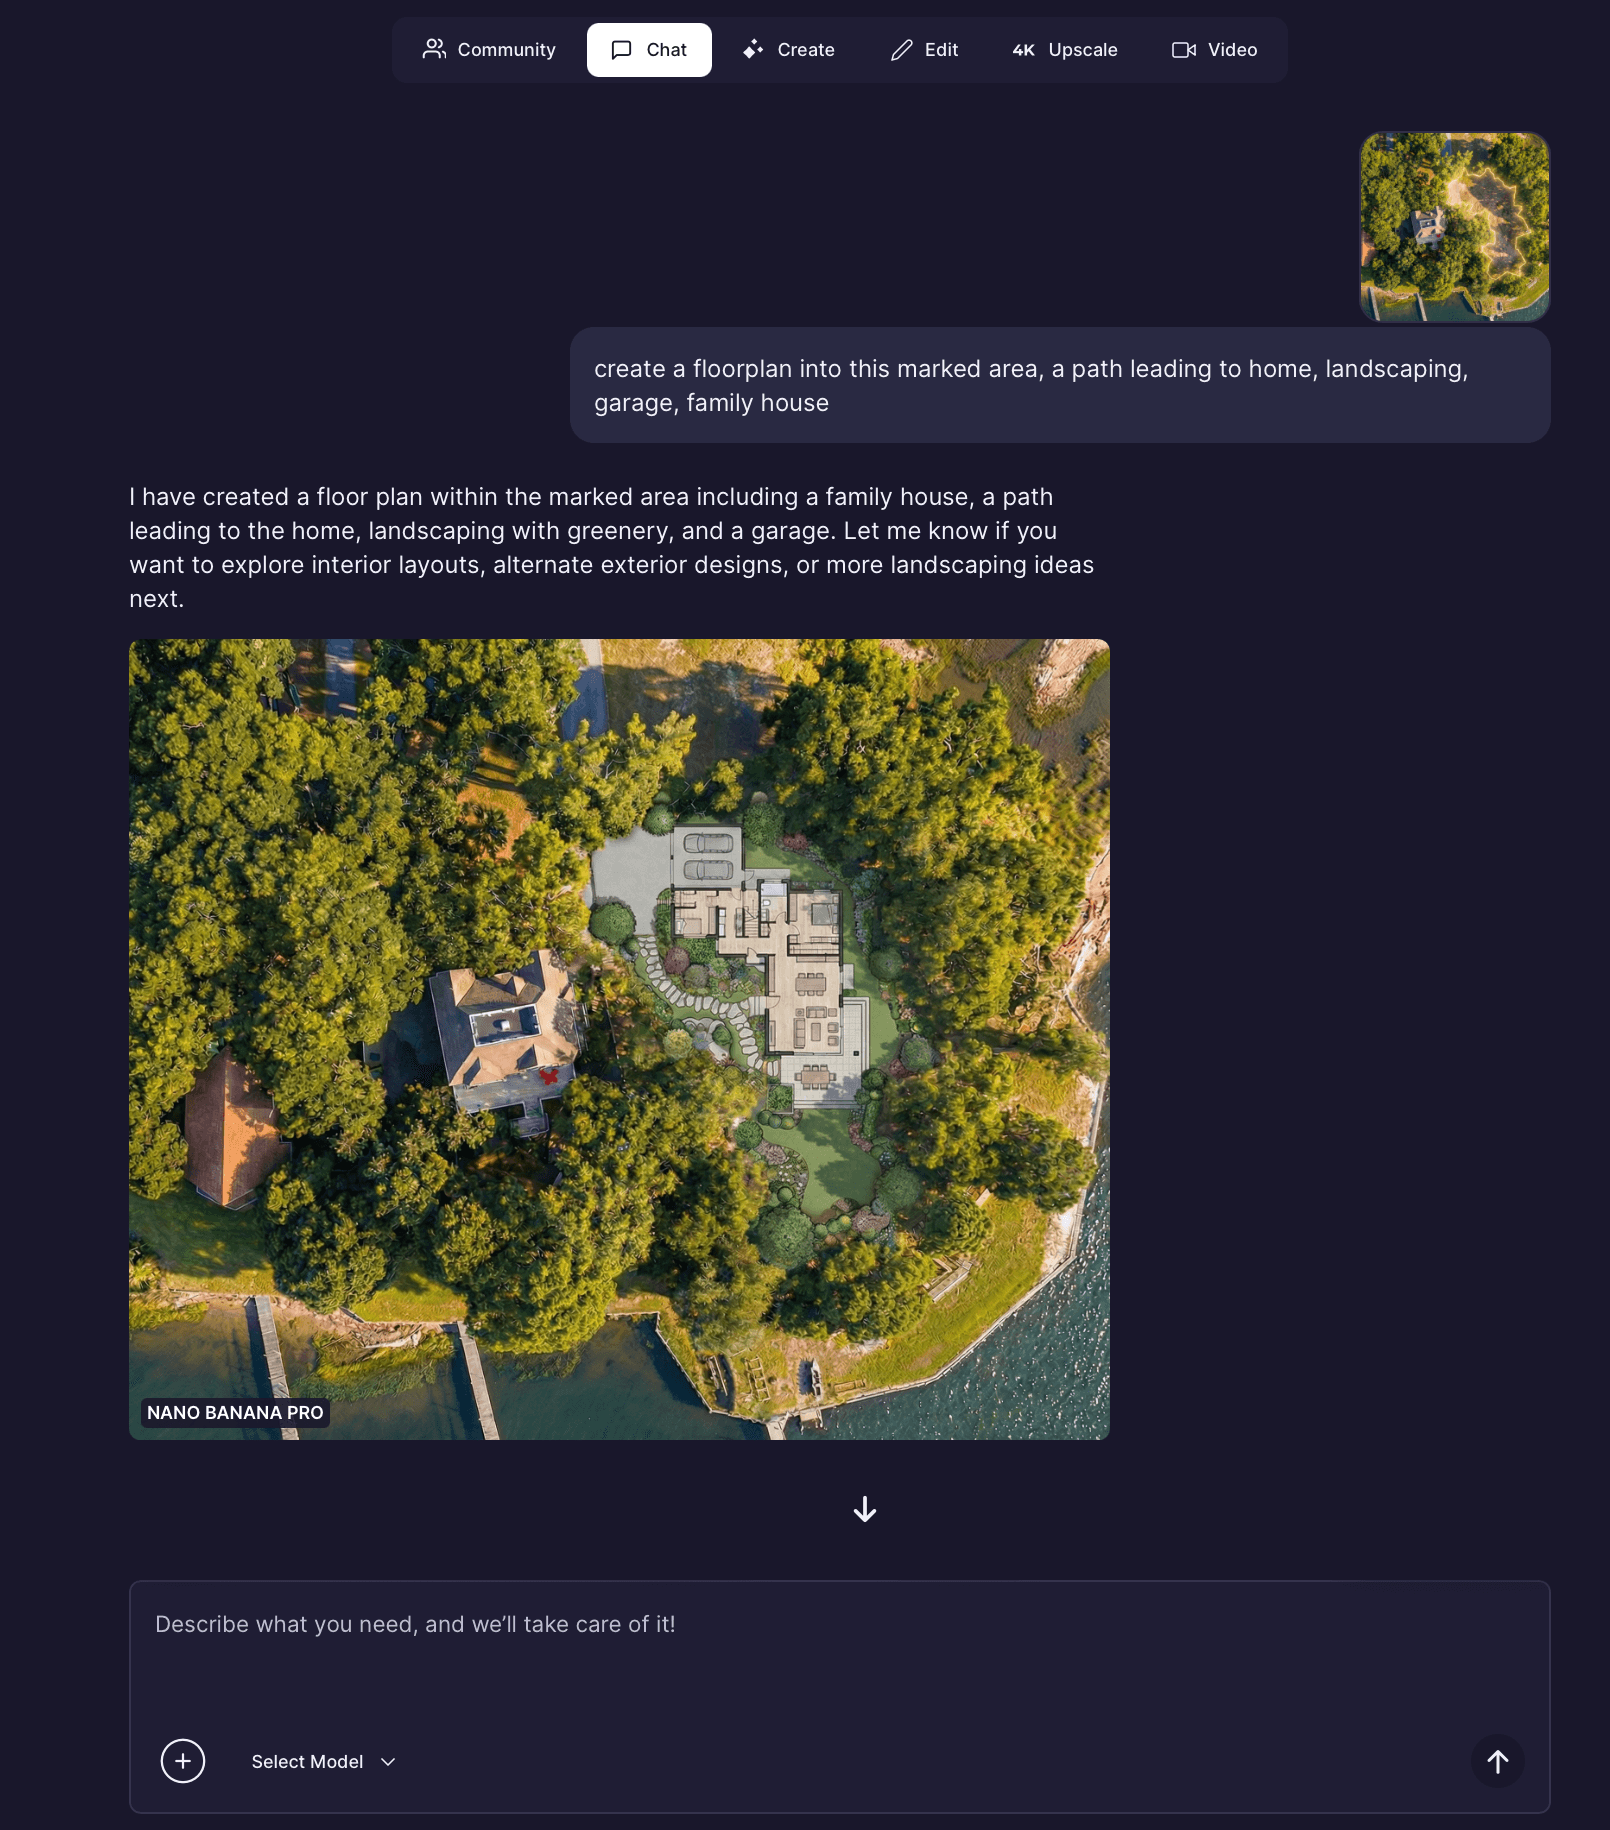
Step 7: Generate a Floor Plan on the Marked Area
Now upload the highlighted image and prompt:
‘‘create a floorplan into this marked area, a path leading to home, landscaping, garage, family house’’
Generate.
In a few seconds, you will receive a conceptual floor plan placed directly inside the marked area.
If you want something more specific, refine your idea. For example:
Open kitchen
2 bedroom
Larger living area
Different layout shape
You can always try again or describe your idea more clearly.
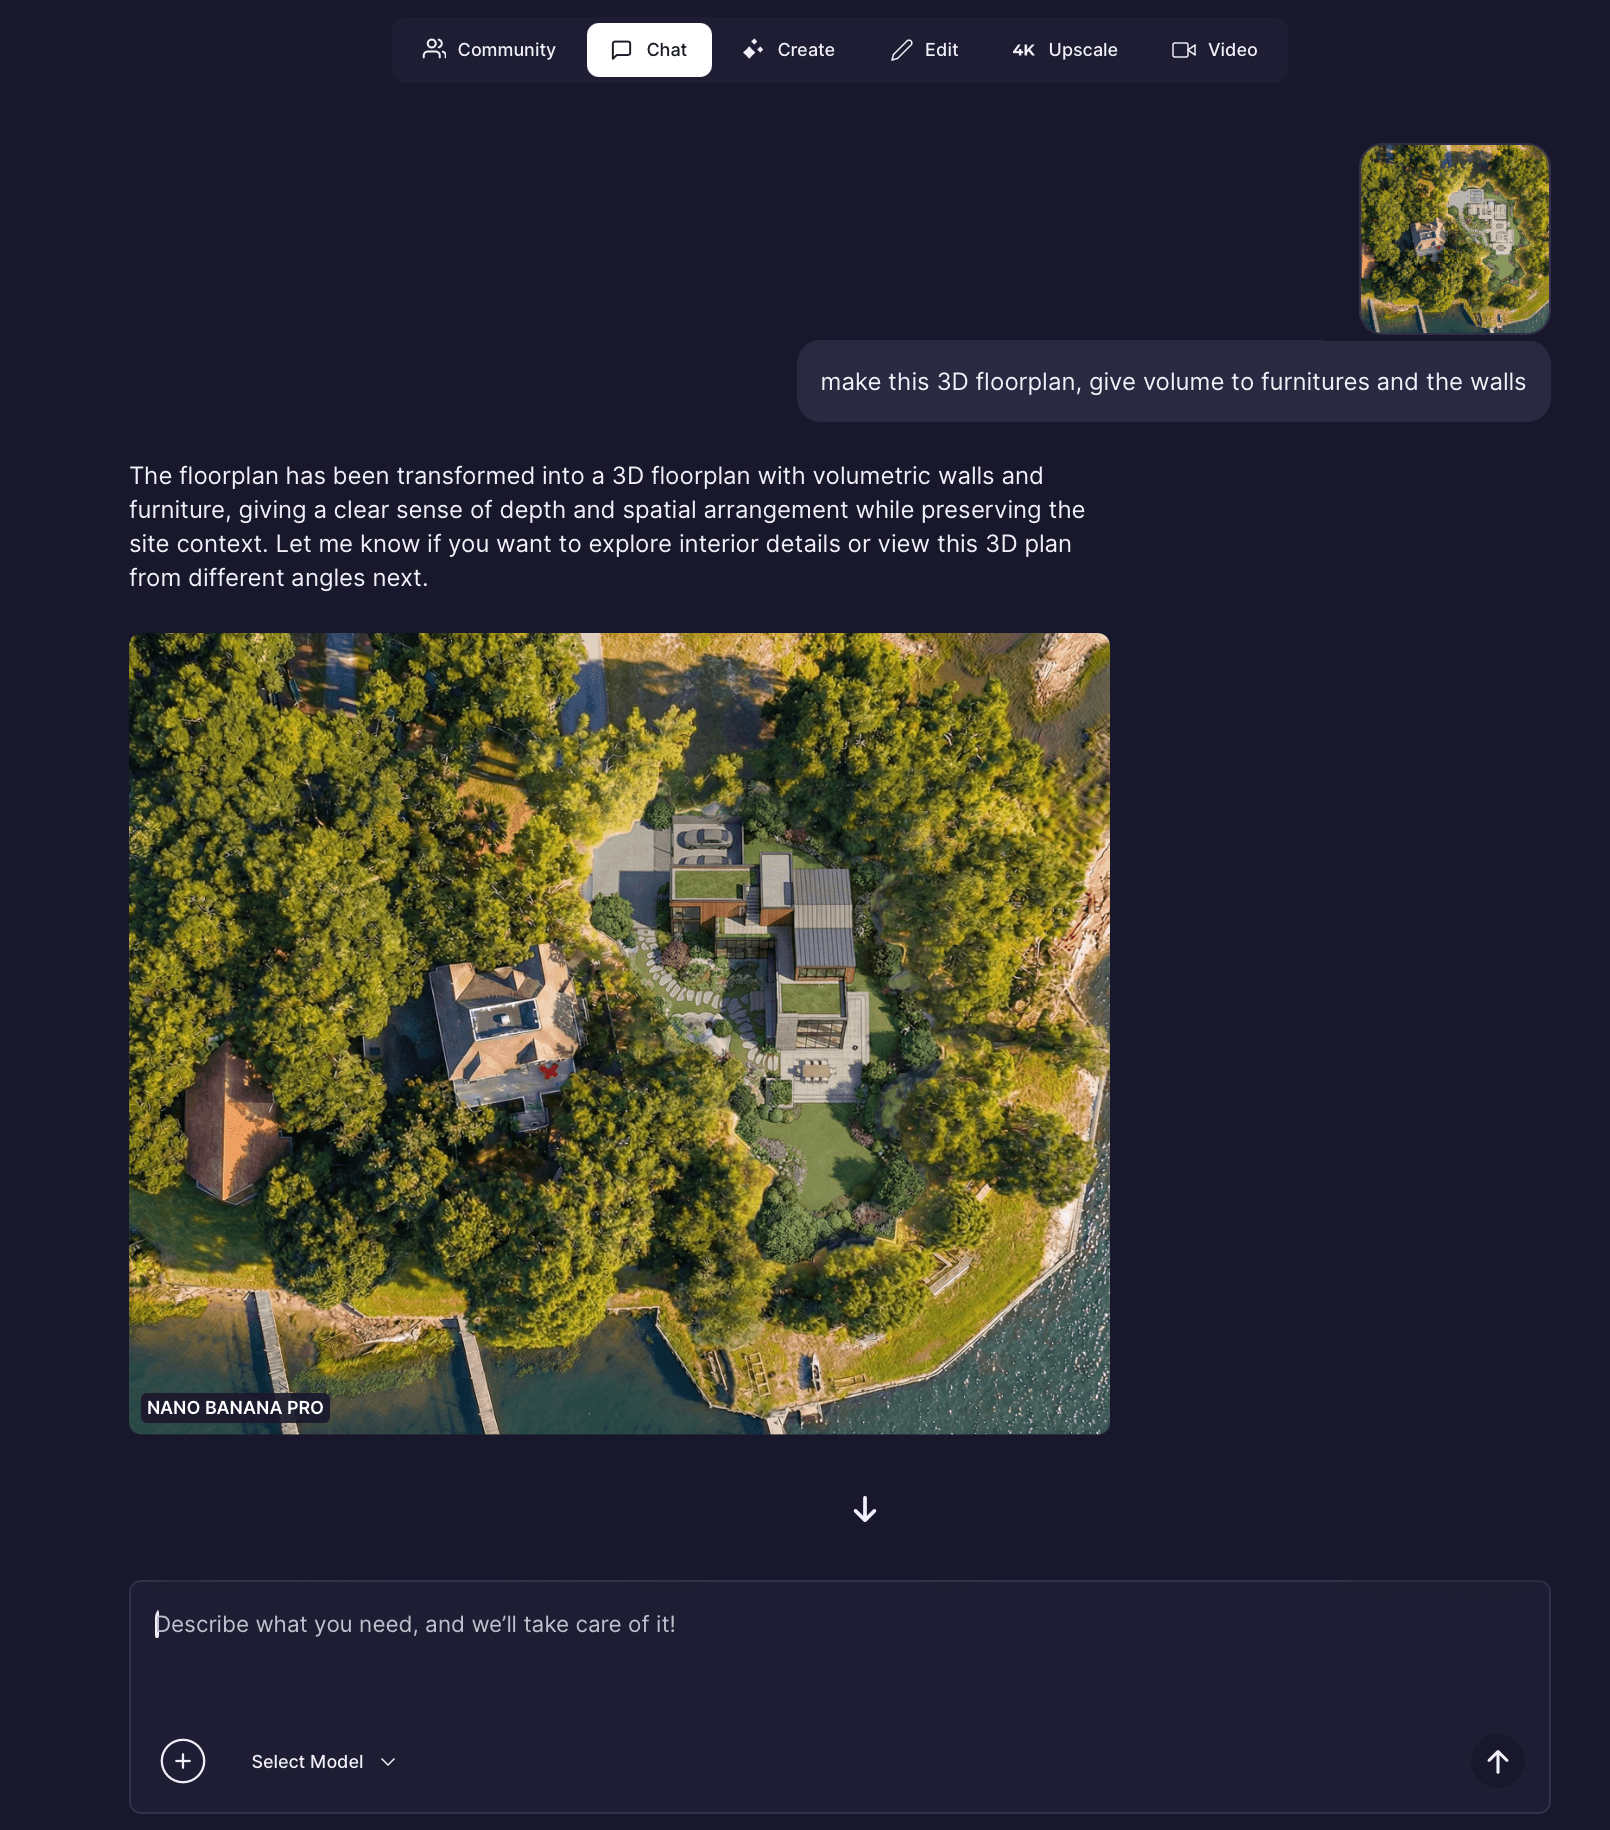
Step 8: Build the House Based on the Floor Plan
Now upload the floor plan image and prompt:
‘‘Actually built the house with the floorplan given and render it in this angle’’
Generate.
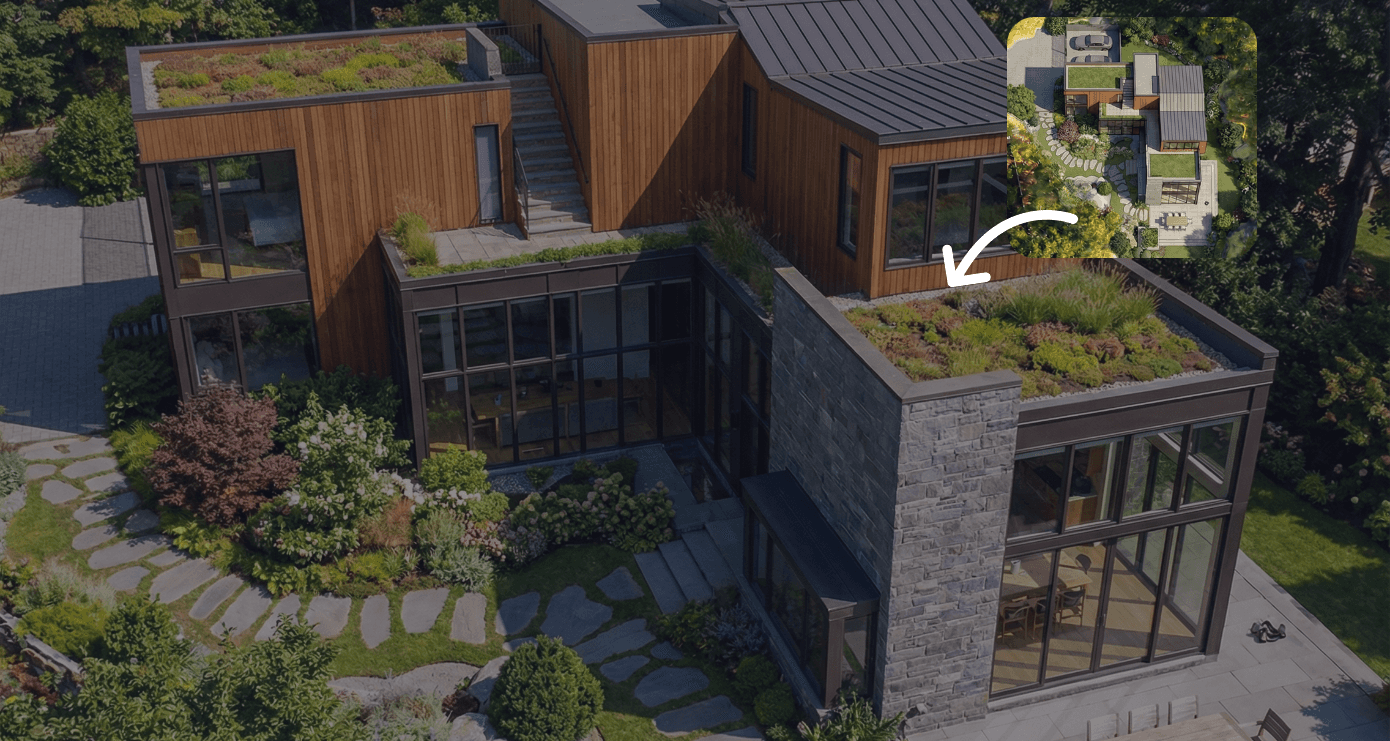
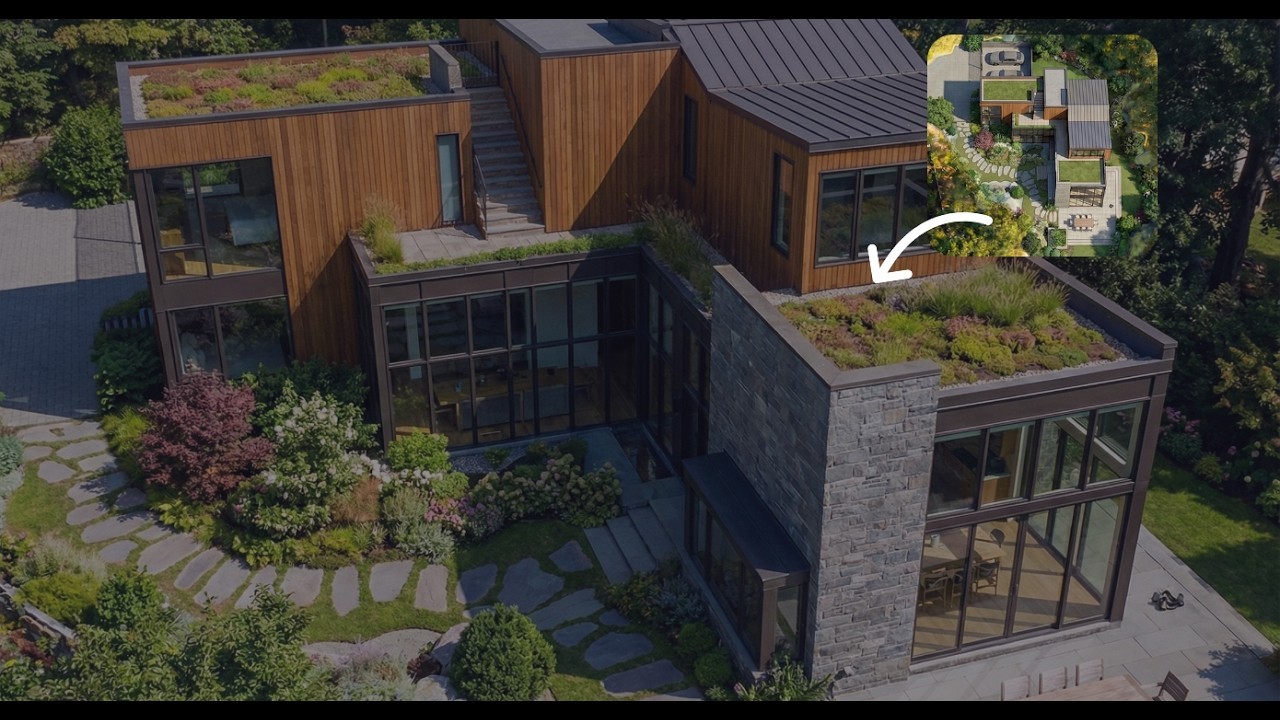
Rendair AI will now transform the 2D floor plan into a built house and render it directly on your site.
You now have your first realistic architectural visualization.
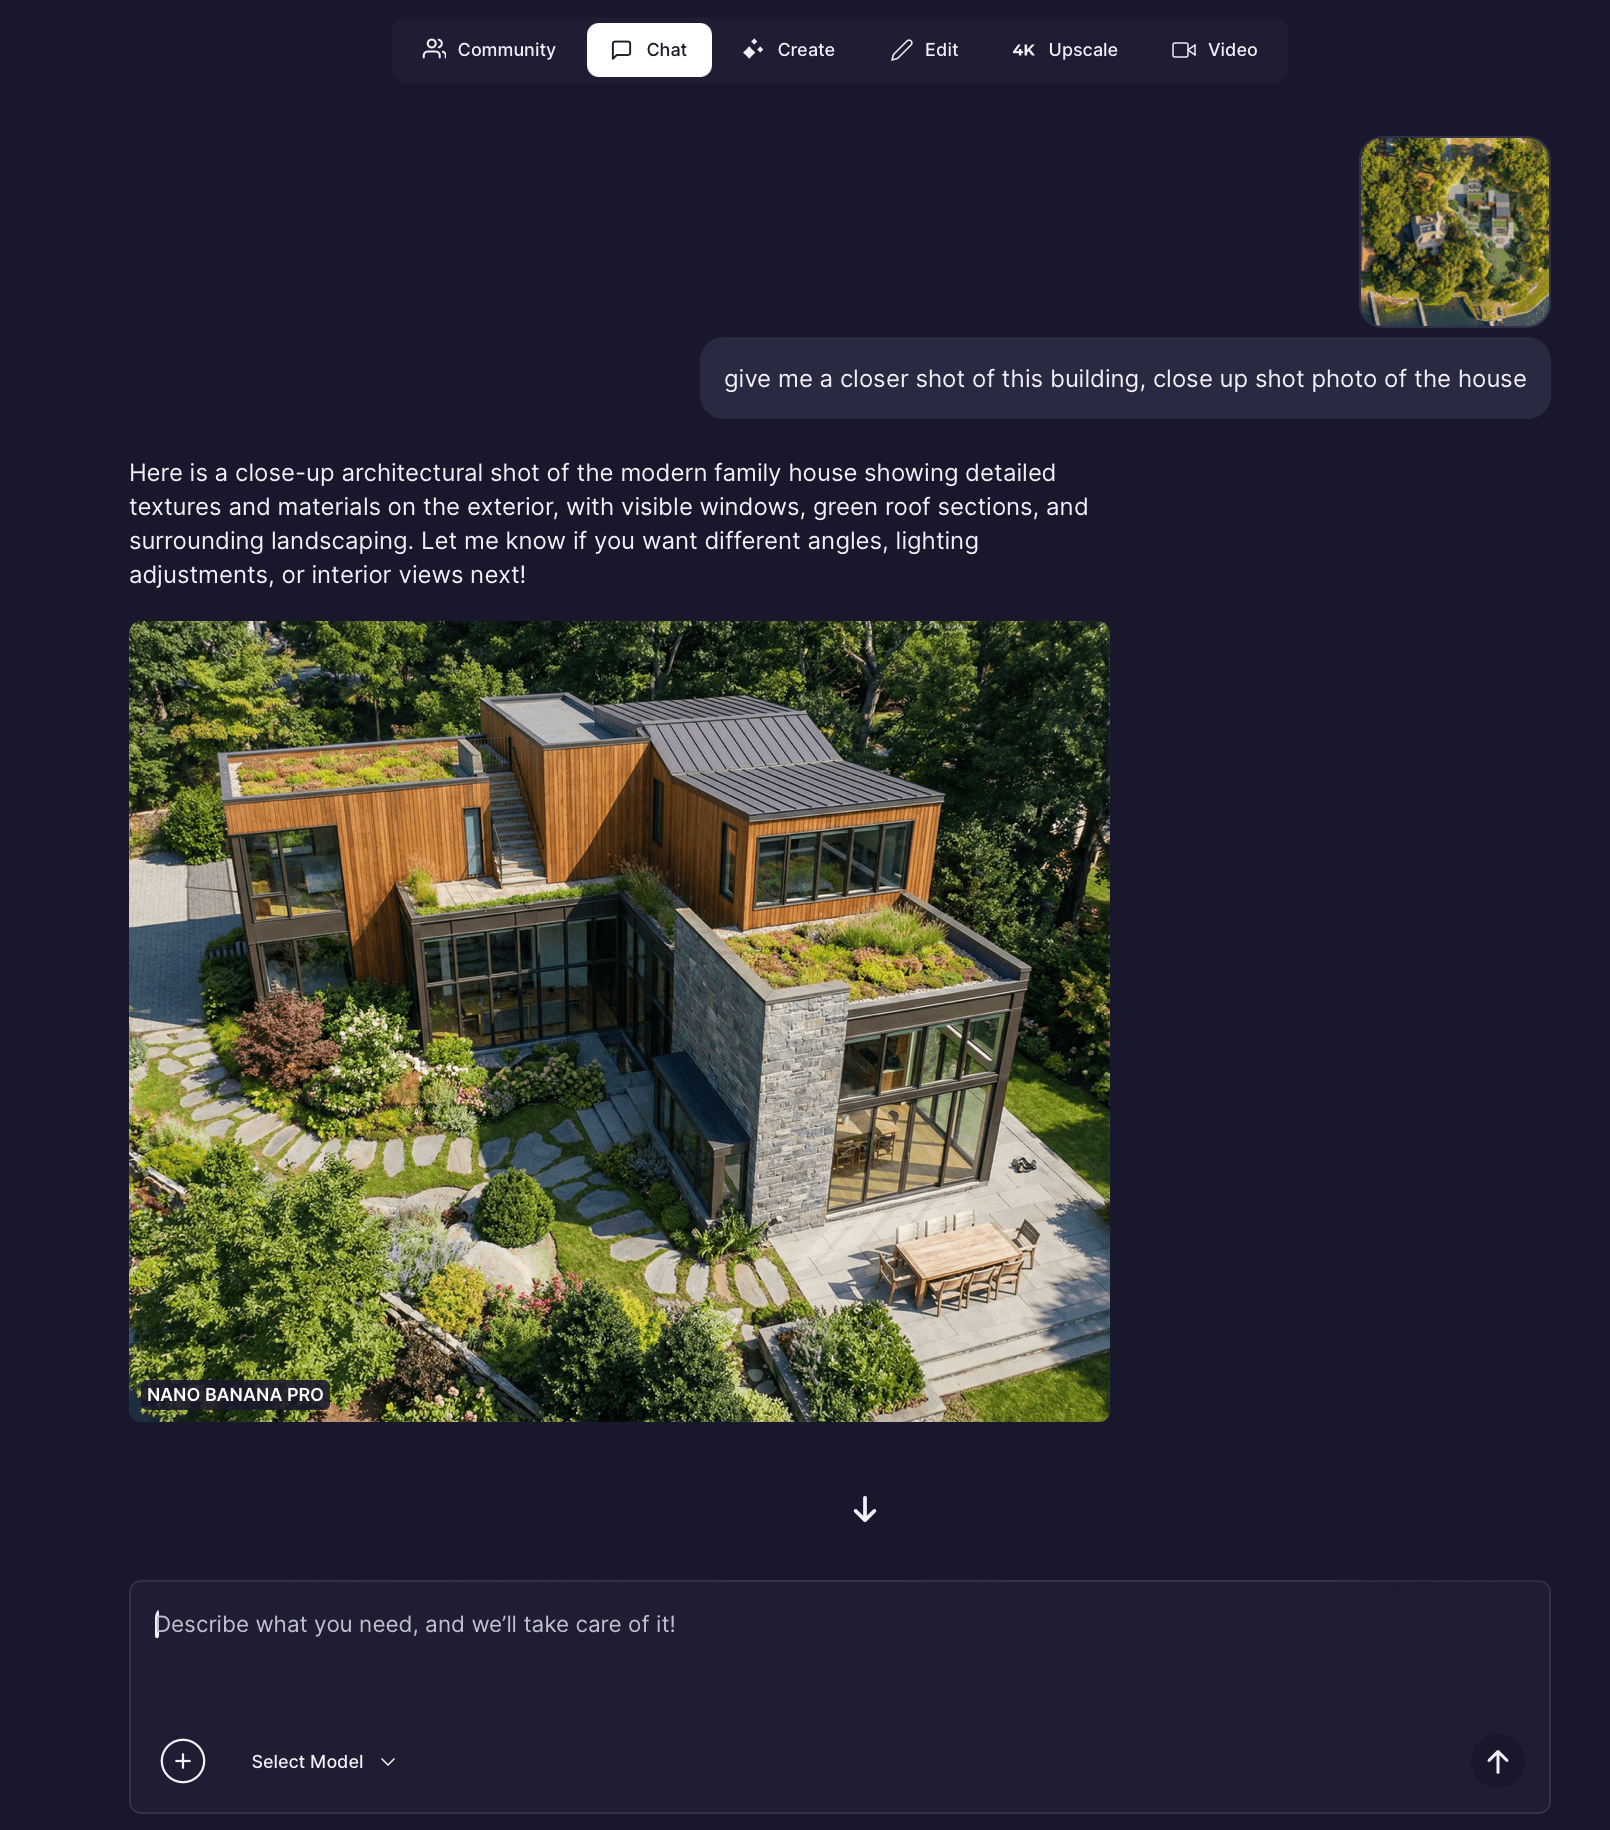
Step 9: Create Closer Views
Now let’s explore different perspectives.
Upload your latest render and prompt:
‘‘give me a closer shot of this building, close up shot photo of the house’’
The chat will generate a closer, more detailed perspective render of the house.
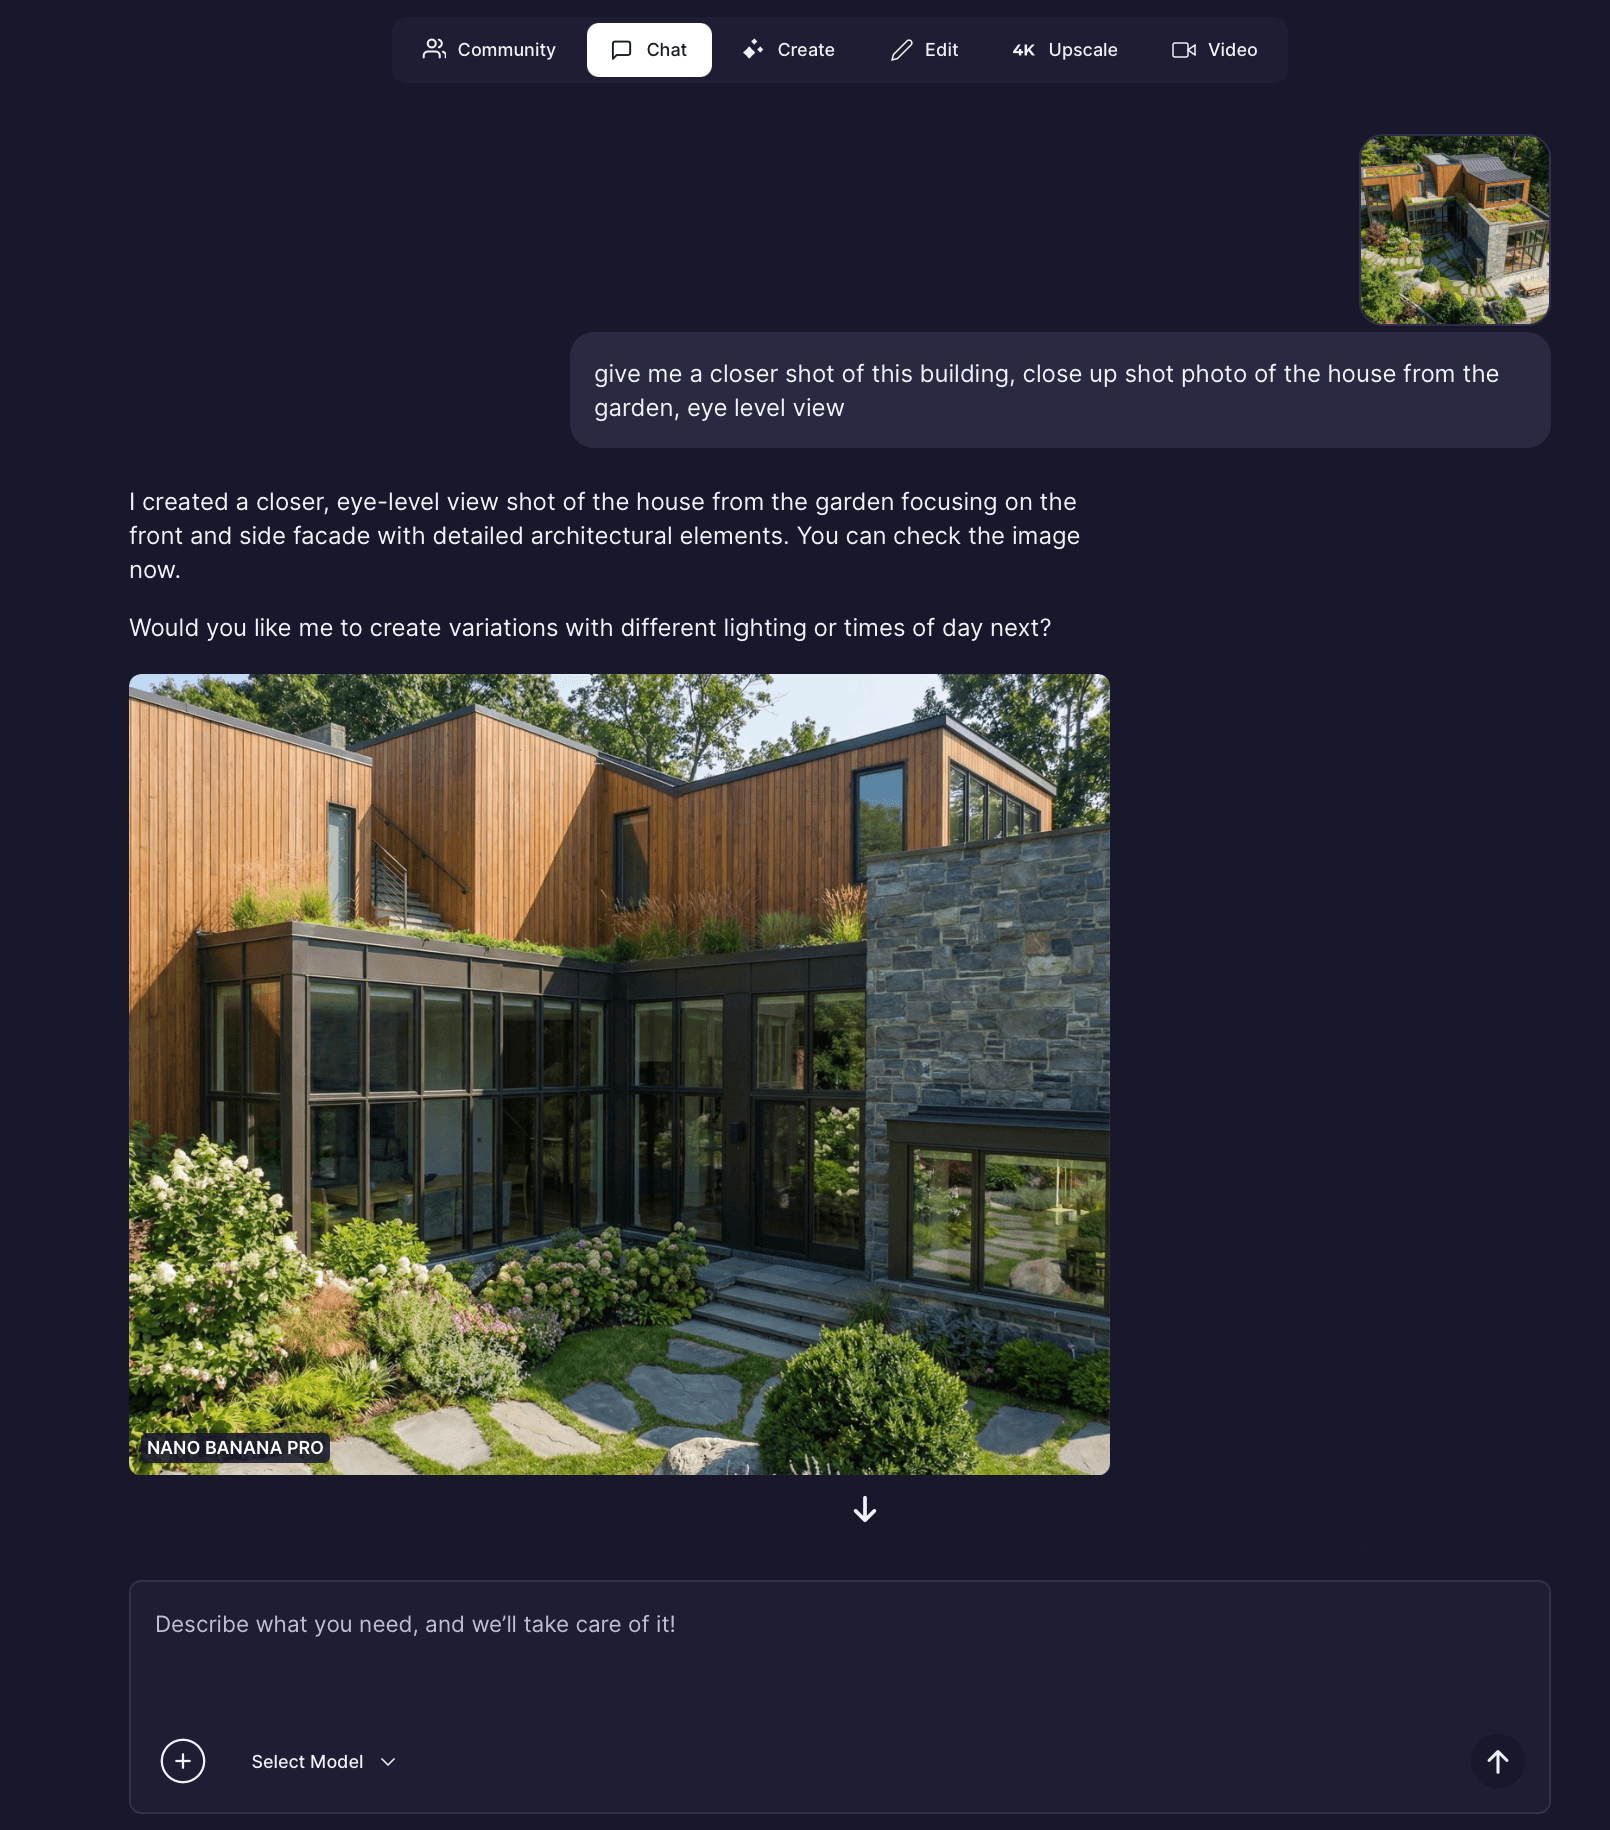
Step 10: Try a Garden View
Upload the same render again and prompt:
‘‘give me a closer shot of this building, close up shot photo of the house from the garden’’
You will now get a new perspective from the garden.
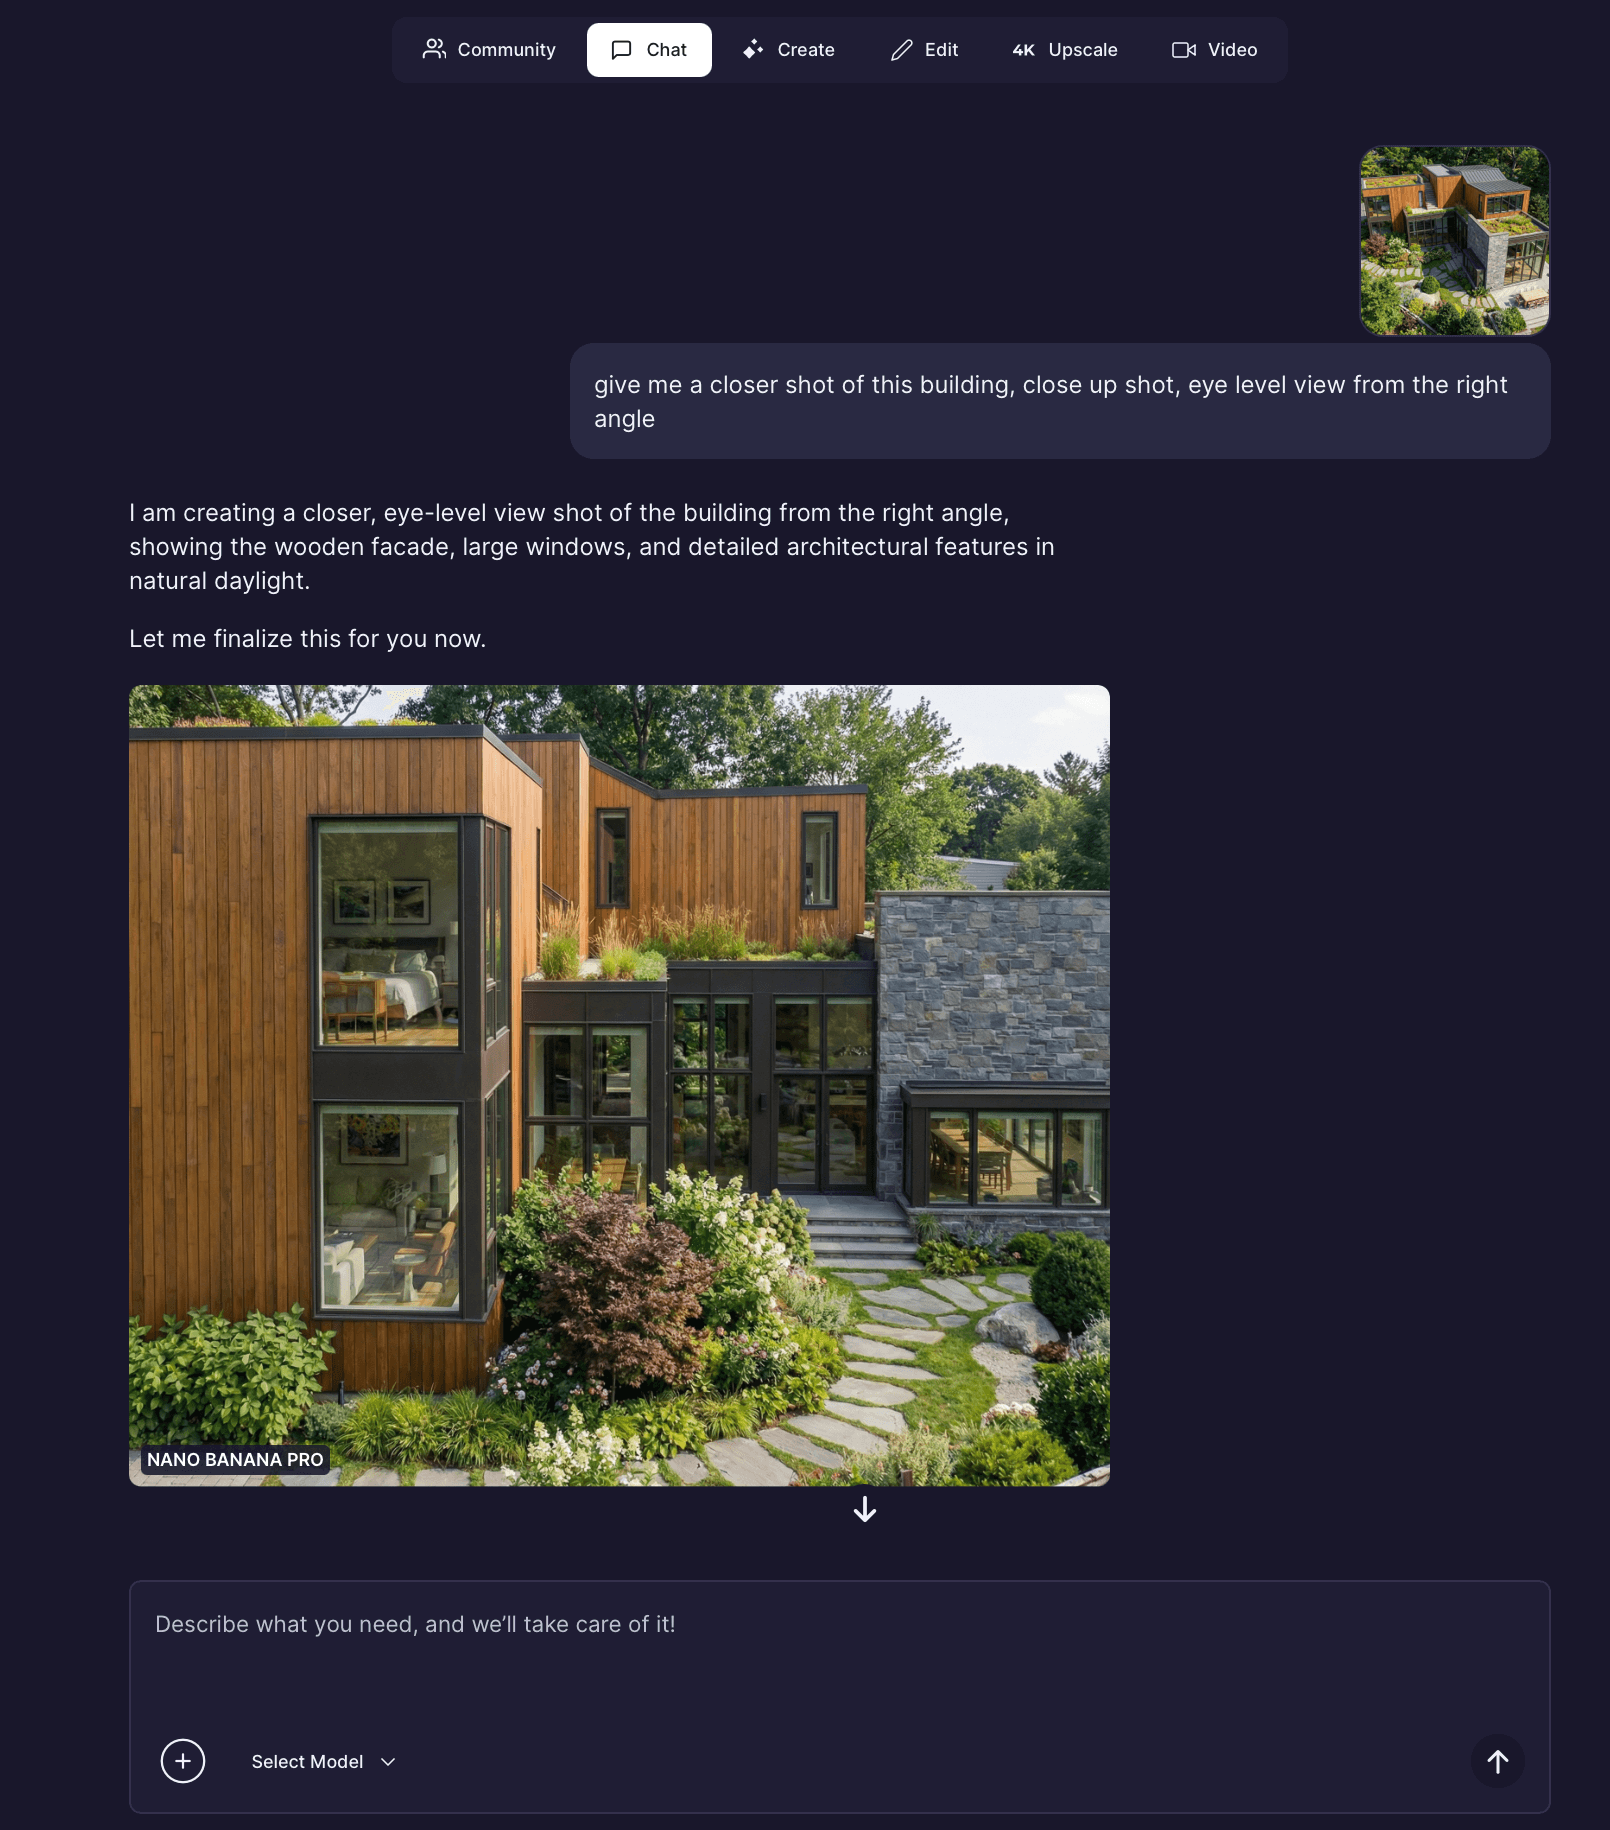
Step 11: Try an Eye-Level Angle
Upload the same image and prompt:
‘‘give me a closer shot of this building, close up shot, eye level view from the right angle’’
Now you have a realistic human-scale eye-level shot.
With this workflow, you can keep generating unlimited angles without redesigning the project.
Step 12: Add People and Atmosphere
Architecture feels complete when it includes life.
Upload your final render and prompt:
‘‘Add people on the table hanging out and having a dinner, enjoying drink, soft light, evening lights, interior lights’’
Generate.
Within seconds, your static render transforms into a lived-in environment with atmosphere and emotion.

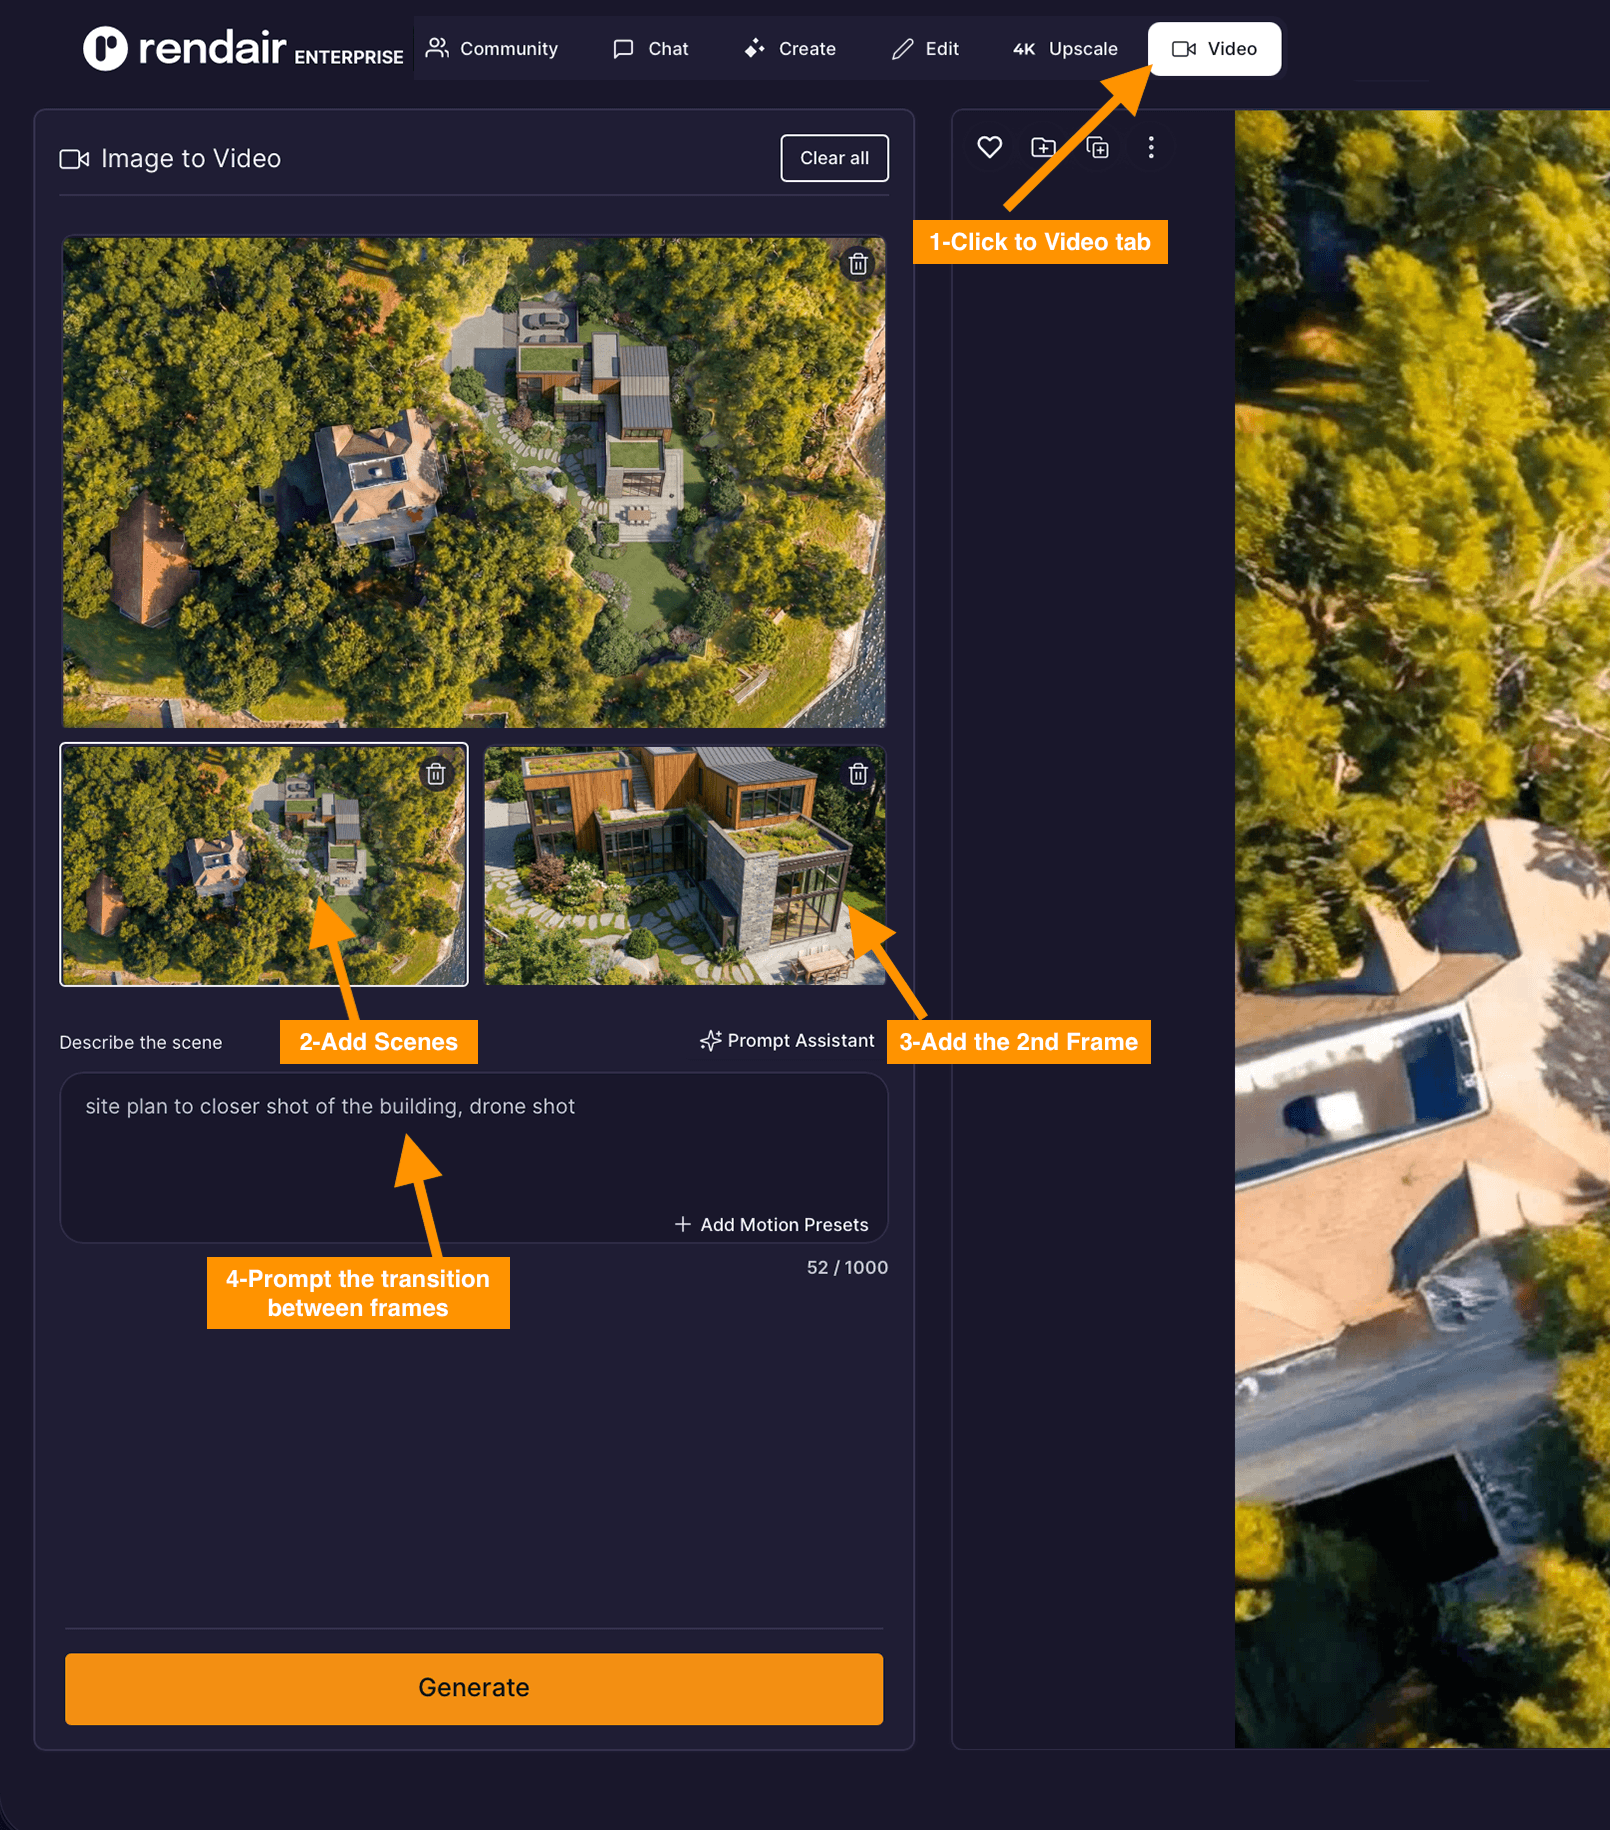
Step 13: Turn Your Images into a Video
Now let’s animate your project.
Go to the Video tab
You will see two frames to upload
Add your first scene
Add your second scene
Describe a motion you like
Generate
Repeat this process for the different angles you created.
Then merge them into a final architectural video walkthrough.
Final Result
Watch the final result video on YOUTUBE!!
Starting from a simple site photo, you:
Marked the buildable zone
Created a floor plan
Built the house
Generated multiple render angles
Added people and lighting
Created a cinematic video
All inside Rendair AI.
This workflow allows architects and designers to move from concept to visualization in minutes, directly on real site conditions.
Conclusion
With this workflow, a simple site photo becomes the starting point for a complete architectural concept.
The key is iteration. Upload, prompt, refine, and generate again. Each step builds on the previous one, allowing you to move quickly from idea to realistic visualization.
For architects and designers, this means faster concept development, clearer client communication, and more confident design decisions from the very first site image.
👉 Open Rendair AI and start integrating your models today
Recent Posts


Join 500,000+ architects who saved time. No credit card needed for your first 20 credits.